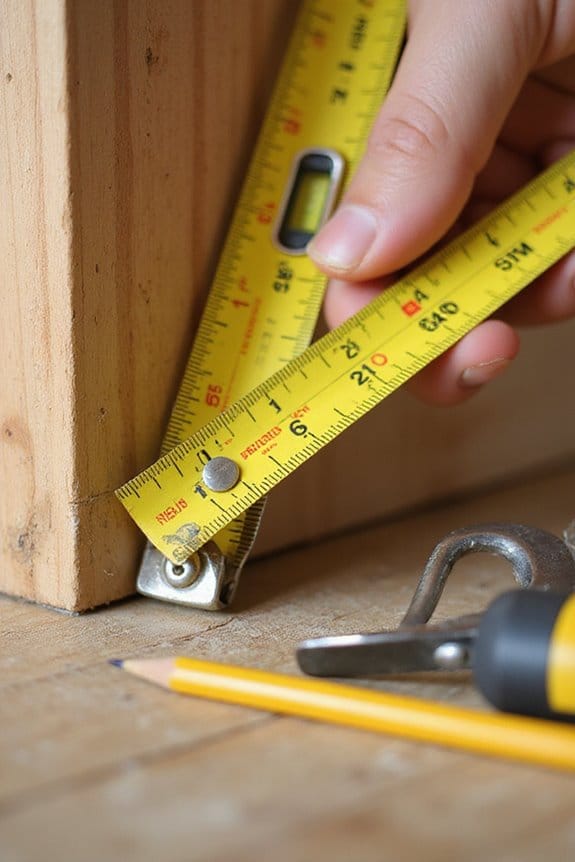
Using a tape measure correctly is easier than it sounds! Here’s how I do it: First, familiarize yourself with the markings—those full inches and fractions can be tricky. Next, position the metal hook at the edge, keeping the tape flat and straight. Hold it steady and read at eye level to avoid mistakes. Make sure the tape is fully extended, and don’t forget to record measurements right away. Stick around, and I’ll share some pro tips for slight adjustments!
Key Takeaways
- Position the tape securely at the edge of the object, ensuring it’s flat and straight for accurate measurements.
- Read the tape at eye level to avoid parallax errors and ensure precision in your measurements.
- Keep the tape fully extended without slack, and avoid excessive bends to maintain accuracy.
- Familiarize yourself with fractional markings, starting at the nearest whole inch for quick reference.
- Grip the tape measure firmly and retract the blade slowly to prevent damage and ensure control.
Understanding Tape Measure Markings
When you’re trying to tackle a project that requires measurements, it’s essential to understand tape measure markings. Here’s a quick breakdown:
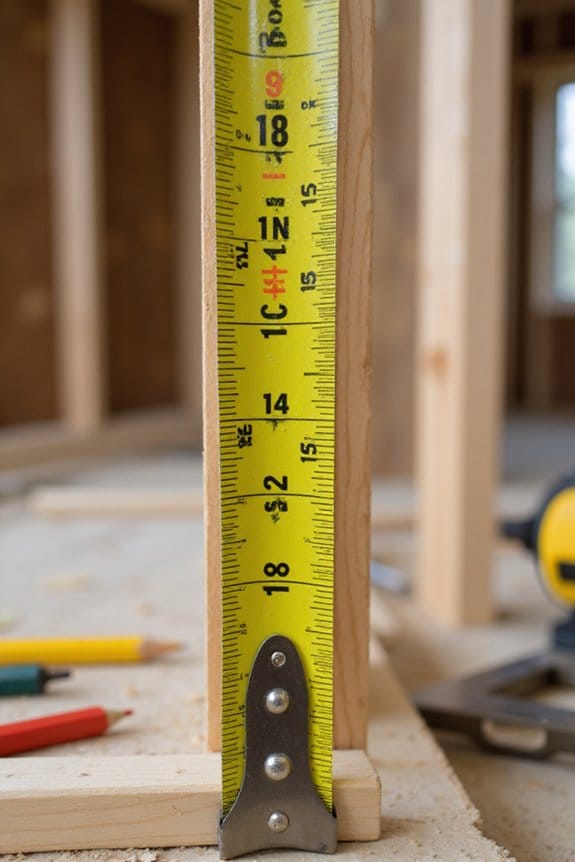
- Inches Explained: The largest tick marks are full inches, making them easy to spot. Every 12 inches, you’ll often see a foot mark for fast reference.
- Half-Inch Markings: These are the second-largest ticks, located between inch marks. They’re vital for fractional understanding, helping you estimate without counting every little mark.
- Smaller Fractions: Quarter, eighth, and sixteenth-inch marks get smaller, with sixteenth marks being the shortest. Knowing these helps you measure precisely.
Using these visual cues can speed up your readings and reduce mistakes, especially in carpentry or sewing. Additionally, easy-to-read markings on some Stanley FatMax models enhance measurement accuracy, so get familiar, and soon you’ll be measuring like a pro!
Basic Measuring Technique
Mastering basic measuring techniques can make all the difference in your projects. Here’s a quick rundown on the tape measure basics to help you get started:
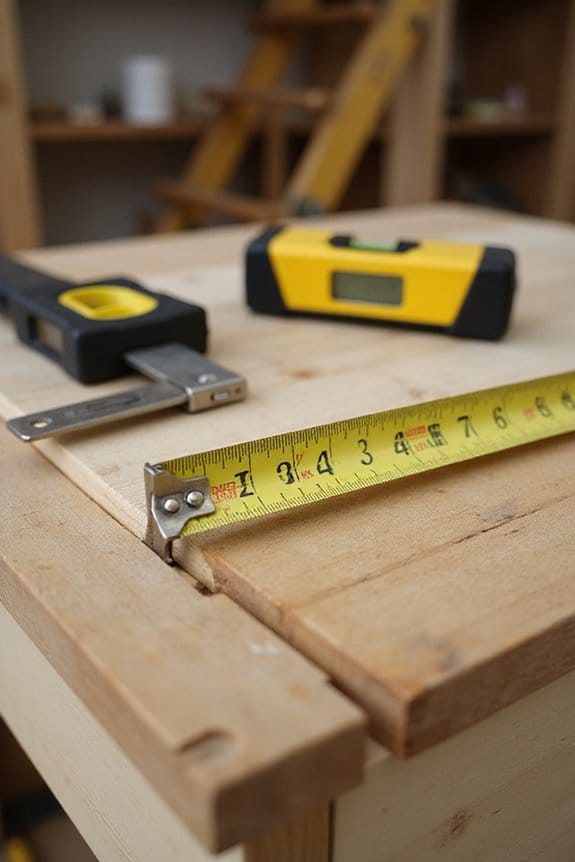
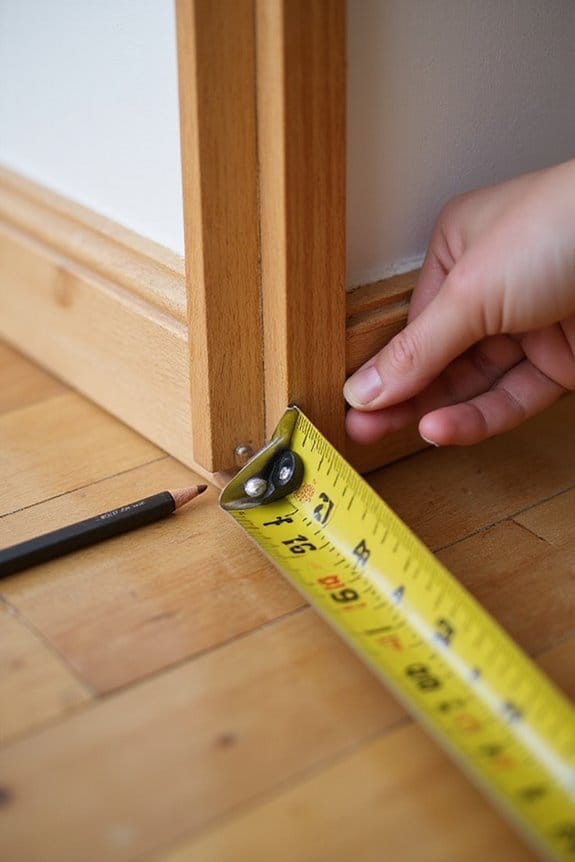
- Positioning: Place the tape hook firmly at the edge of your object. Keep it flat and straight to avoid inaccuracies.
- Securing: Hook the metal tab over the edge, and press it firmly against both ends for inside measurements.
- Eye Level: Read the tape at eye level to prevent parallax errors.
- Hands On: Use one hand to guide the tape and the other to hold the housing.
- Record: Always mark your measurements right away to avoid confusion later.
Additionally, consider using measuring tapes with self-locking mechanisms to enhance accuracy by preventing slippage while measuring.
With these measuring techniques, you’ll be a pro in no time!
Techniques for Greater Accuracy
To achieve greater accuracy in your measurements, it’s essential to employ a few effective techniques. Here are some tips:
- Keep the Tape Straight: Always hold the tape fully extended without slack. Tape sagging can lead to inaccurate readings.
- Positioning: Hold the tape perpendicular to the object to avoid parallax errors.
- Use the Metal Tab: Hook it firmly on the edge or butt it against the surface for consistent starting points.
- Avoid Bending: Excessive bends can distort readings, especially in corners.
- Double-check Long Distances: If measuring long lengths, split them into sections. Mark intermediate points for measuring consistency and re-measure to catch errors. Additionally, ensure that you understand the importance of measurement accuracy to achieve precise results.
Reading Fractional Measurements
Reading fractional measurements on a tape measure can seem challenging at first, but once you get the hang of it, it’s actually pretty straightforward. Here’s how I break it down:
- Understand fractional increments: Each inch is divided into 16 parts. The smallest marks are 1/16 inch, while the longer marks indicate 1/4 and 1/2 inches.
- Follow the visual hierarchy: Longer marks show quarters and halves, making it easier to read fractions quickly.
- Use reference points: Start at the nearest whole inch mark.
- Practice regularly: Familiarity makes it easier to spot those pesky sixteenths!
Before you know it, you’ll be measuring like a pro, and you might even impress a few friends along the way!
Handling and Holding the Tape Measure
Once you’ve got the hang of reading fractional measurements, it’s time to focus on how to handle and hold your tape measure properly. Here are some tips to improve your grip techniques:
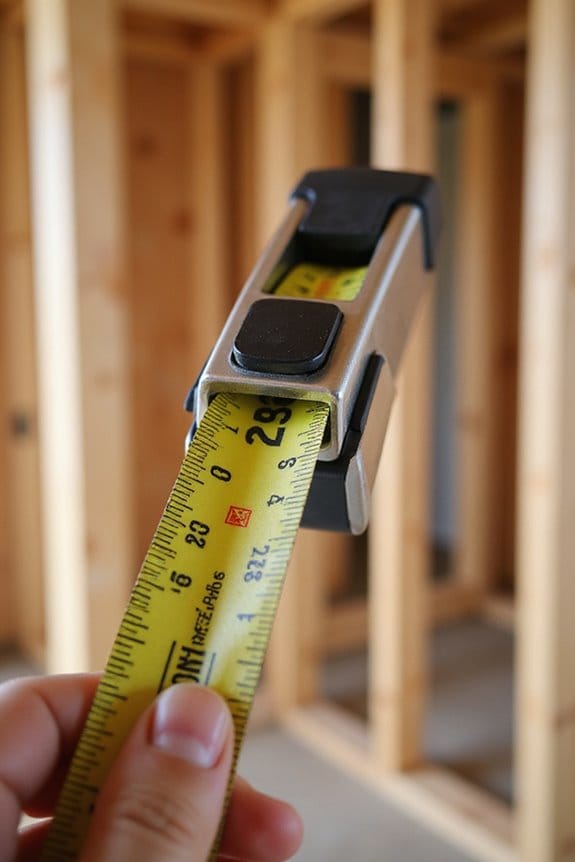
- Grip Firmly: Hold the tape measure in your palm for maximum control. Your thumb can operate the locking mechanism if it has one—super handy!
- Smooth Blade Extension: Use your index finger to pull out the blade smoothly. Avoid jerking it; nobody likes a surprise.
- Keep It Steady: Make sure the tape blade stays flat against your measuring surface. This helps improve accuracy.
- Retract Slowly: When you’re done measuring, retract the blade gently to avoid damaging it or the case.
With these tips, you’ll be measuring like a pro in no time!
Practical Tips and Tricks for Measuring Projects
Measuring projects can feel a bit challenging, but with the right tips and tricks, you’ll find it’s easier than you think! Here are some practical suggestions:
- Know Your Increments: Identify full inches and shorter lines for fractions. It helps to use marked lines for quicker readings.
- Use the Hook Correctly: Remember, the sliding end hook compensates for thickness. Make sure it’s not loose or bent!
- Keep It Straight: Taut and straight tape prevents inaccuracies. Use the “draw and fold” method for long measurements.
- Double-Check: Always measure twice, especially for critical dimensions.
- Tape Measure Maintenance: Regularly check your measuring tools for wear and tear to keep them reliable. Additionally, using a durable material like aluminum for your measuring tools can enhance their longevity and accuracy.
With these tips, you’ll be measuring like a pro in no time!
Frequently Asked Questions
How Do I Calibrate My Tape Measure for Accuracy?
Calibrating my tape measure involves employing calibration techniques and performing accuracy checks against a certified reference tape. I always inspect for damage and record discrepancies to ascertain my measurements remain precise and reliable over time.
What Materials Are Tape Measures Made From?
When I think about tape measures, metal types like steel and stainless steel contrast with flexible fiberglass. Each serves a purpose, especially as tape lengths vary, making them essential for my projects and precise measurements.
Can I Use a Tape Measure in the Rain?
Absolutely, I can use a tape measure in the rain if it’s water-resistant. It’s essential for accurate measuring techniques outdoors, ensuring I get reliable results without worrying about rust or damage from wet conditions.
How Do I Store My Tape Measure Properly?
As they say, “A place for everything and everything in its place.” I store my tape measure safely in a toolbox for proper tape measure organization, keeping it dry and clean to guarantee ideal tape measure storage.
What Should I Do if My Tape Measure Gets Stuck?
If my tape measure gets stuck, I’d inspect for debris and check the spring’s condition. For stuck tape, I might attempt simple tape repair before considering a replacement, ensuring it’s clean and properly maintained moving forward.