If your stud finder is giving false readings, it could be due to a few common issues. First, check your calibration—make sure it’s set correctly for wall type. Next, weak batteries can cause erratic performance, so swap those out. Dense materials or metal nearby can confuse the tool. Finally, how you hold and move the device matters too; keep it steady and in contact with the wall. Want to know more tips to improve accuracy? Stick around!
Key Takeaways
- Calibration errors from scanning on stud-filled walls can lead to inaccurate readings; always calibrate on a stud-free wall.
- Weak or old batteries are a common cause of malfunctions; check and replace them regularly for optimal performance.
- Wall composition, such as insulation or metal components, can interfere with detection and cause confusion in readings.
- Environmental factors, like high humidity or nearby electrical devices, can distort signals and trigger false positives.
- Improper user technique, such as moving the tool too quickly or not maintaining contact with the wall, can result in erratic signals.
Calibration and Operation Errors
When it comes to using a stud finder, I can’t stress enough how important calibration is—especially if you want accurate readings. Here are some key calibration techniques and operation guidelines I’ve learned:
- Calibrate on a stud-free wall: This resets your device’s baseline, helping it ignore consistent wall density.
- Choose the right mode: Confirm you’re scanning for wood or metal based on your wall type. Mistakes here can lead to confusion.
- Scan slowly: Rushing can cause the device to miss important changes in wall density.
- Avoid interference: Keep other metal objects away and hold the stud finder properly to confirm accuracy.
Battery and Power Issues
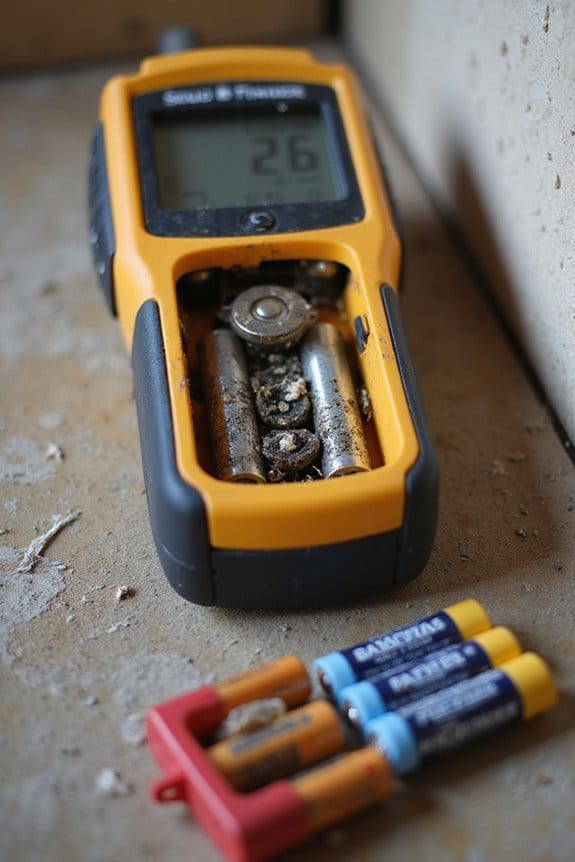
Calibration issues can lead to some frustrating false readings, but another common culprit is battery and power problems. Here’s what I’ve learned about keeping your stud finder in top shape:
- Battery Lifespan: Old or weak batteries cause about 90% of malfunctions. Always check their condition, even if they’re new.
- Power Fluctuations: Inconsistent battery power can lead to misinterpretations. If your stud finder starts beeping or flashing, it’s probably time for a replacement.
- Storage Tips: Remove batteries during long storage to prevent leakage.
- Quality Counts: Invest in high-quality batteries known for holding charge well. Additionally, ensure that you choose batteries with efficient power management to reduce frequency of replacements.
Material and Wall Composition Challenges

Understanding the impact of wall material and composition on stud finders can be a game-changer, especially if you’ve ever wrestled with false readings. Here are some common challenges you might face:
- Wall Density: If the density of your wall materials is similar to studs, you’ll get confusing readings.
- Composite Materials: Insulation effects from layered walls can interfere, making detection tricky.
- Plaster Interference: Metal components like lath or mesh under plaster can confuse standard stud finders.
- Finishing Materials: While paint or wallpaper usually don’t affect detection, textured surfaces might lead to inaccuracies.
Environmental and External Interference
Environmental and external factors can really throw a wrench in your stud-finding efforts. Here’s what to watch out for:
- Humidity Effects: High moisture levels can change material density, causing erratic readings. Even freshly painted walls might throw you off.
- Electrical Interference: Live wires close to the surface can trigger false positives. If they’re deep or behind metal, good luck detecting them!
- Magnetic Fields: Nearby electrical devices can distort signals. Be cautious of those pesky magnetic fields.
- Metallic Objects: Pipes or metal studs nearby can confuse your stud finder, leading to more false alarms.
- Temperature Fluctuations: Extreme temps can affect your tool’s calibration, so keep that in mind when scanning.
With these factors in play, it’s no wonder stud finding can be tricky!
Screws, Nails, and Fasteners Impact

When you’re on the hunt for studs in your walls, screws, nails, and fasteners can really complicate things. Here’s how:
- False Positives: Screws and nails trigger metal detection modes. They often register as studs, leading to confusion.
- Density Changes: Clusters of fasteners can create wider signals, making it hard to pinpoint actual stud locations.
- Calibration Issues: If you calibrate your stud finder over a fastener, it might ignore other signals, causing missed studs or erratic readings.
- Fastener Types Matter: Different fasteners affect detection methods differently. Magnetic stud finders are particularly susceptible to misreading nails.
User Technique Factors
Even though using a stud finder seems straightforward, your technique can greatly impact its accuracy. Here are a few user technique factors to keep in mind:
- User Grip: Hold the stud finder firmly but not too tight. A relaxed grip helps avoid sudden movements that can confuse the device.
- Movement Speed: Move the tool slowly and steadily. If you rush, it might miss important density changes, leading to false readings.
- Consistency: Keep the device in constant contact with the wall. Uneven movements can trigger erratic signals, leaving you guessing where the studs really are. Additionally, maintaining consistent contact with the wall is crucial for achieving high accuracy rates in stud detection.
Common Misconceptions About Stud Finders
Using a stud finder can be a bit like trying to solve a puzzle, and misconceptions about how these devices work can make that puzzle even trickier. Here are a few common misunderstandings I’ve encountered:
- Misunderstood Technology: People often think stud finders are foolproof. In reality, they can pick up metal pipes or screws, leading to false positives.
- Calibration Confusion: Not calibrating the device properly? That’s a recipe for disaster.
- User Assumptions: Some assume these gadgets work on any wall type without adjustments, but that’s not true.
- Ignoring Environmental Factors: Objects nearby can interfere with readings, causing confusion.
- Limited Detection Depth: Some stud finders have a maximum detection depth of 1.5 inches, which may not suffice for all wall types.
Tips for Accurate Stud Detection
Accurate stud detection can feel a bit like hunting for treasure, but with the right approach, you can assure you find exactly what you’re looking for. Here are some tips:
- Calibration: Always calibrate your stud finder on a stud-free wall. This assures accurate readings based on the scanning frequency you need.
- Detection Modes: Choose the right detection mode for the wall material—wood or metal?
- Scanning Technique: Move slowly and steadily, overlapping your scans for better coverage.
- Verification: Use knocking or tapping to confirm stud locations.
- Environment: Be aware of wall texture or hidden pipes that might interfere.
With these tips, you’ll be a stud-finding pro in no time! Remember to consider the importance of accuracy in your measurements to ensure reliable results. Happy hunting!
Frequently Asked Questions
Can Stud Finders Detect Pipes Behind Drywall?
Yes, stud finders can detect pipes behind drywall, but their effectiveness varies with drywall thickness. I’ve noticed that some devices struggle with accurate pipe detection, especially when pipes are not metal or are poorly positioned.
How Do I Know if My Stud Finder Is Broken?
If I think my stud finder’s broken, I check for common issues like battery power and calibration. Troubleshooting tips include ensuring proper mode selection and scanning technique to eliminate false readings before considering replacement.
Are There Any Specific Brands Recommended for Accuracy?
When considering brand comparisons for stud finders, I’ve found that accuracy ratings often highlight models like Franklin Sensors ProSensor M210 and Zircon MultiScanner A200 for their reliable precision, especially on challenging surfaces.
What Is the Typical Lifespan of a Stud Finder?
My stud finder typically lasts 5 to 10 years with proper maintenance. I’ve found that electronic types need more care, while mechanical ones last longer but can wear down. Regular checks really help extend their lifespan.
Can I Use My Stud Finder on Brick Walls?
I’ve found that using a standard stud finder on brick walls often leads to disappointment. The stud finder limitations become clear—brick wall detection is tricky, and you’ll likely get false readings or none at all.